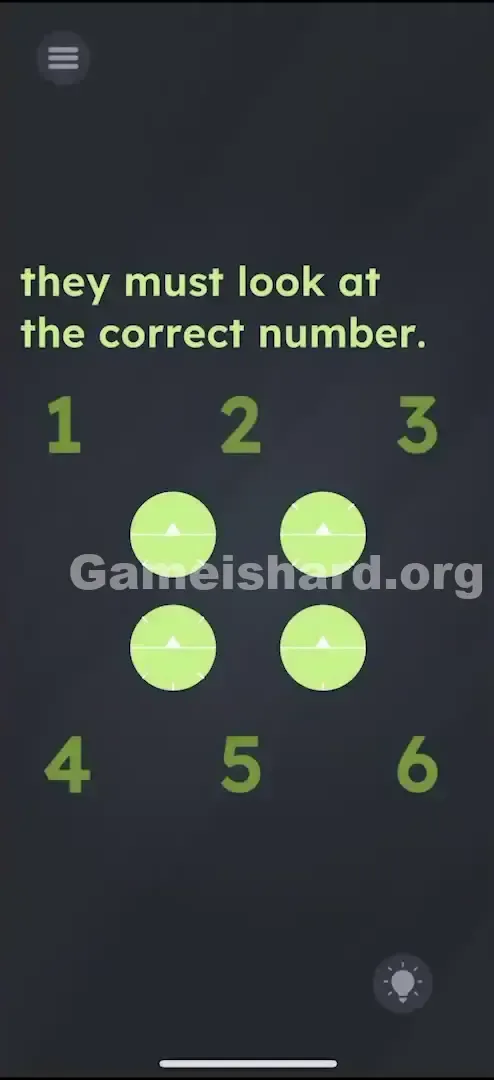
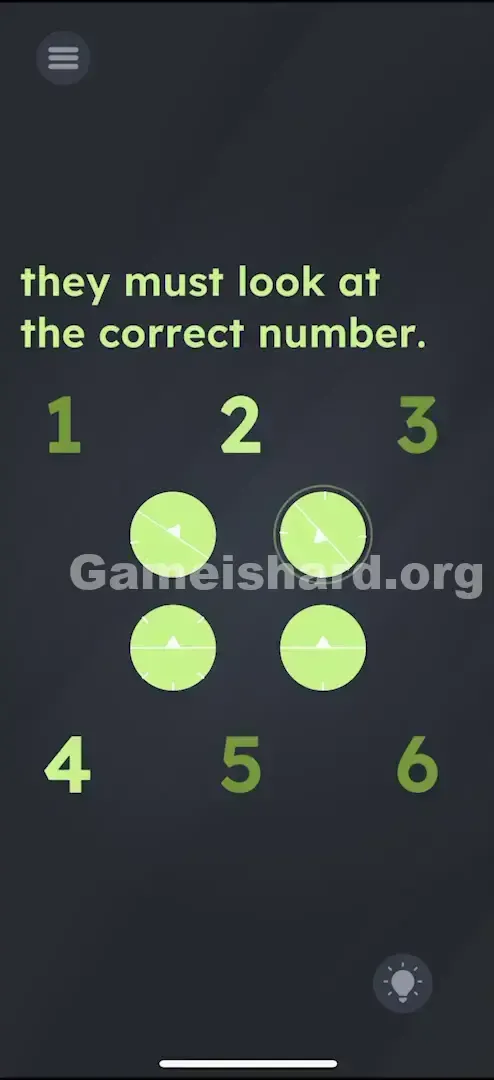
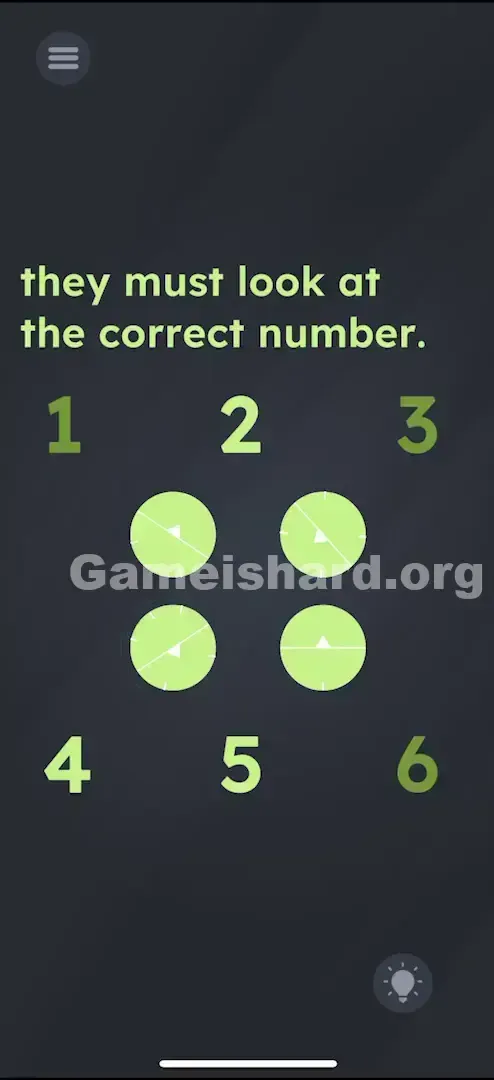
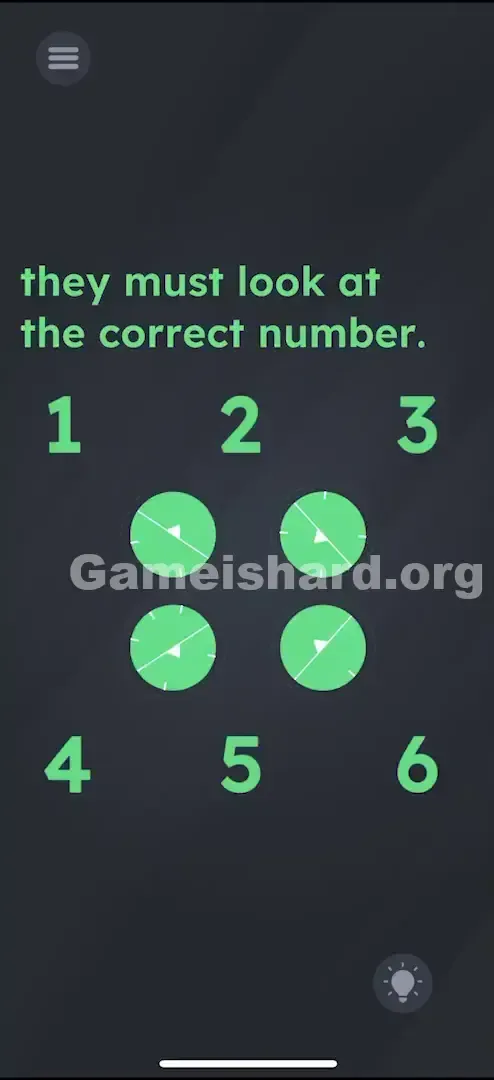
App updates can occasionally shift puzzle order. If this level 89 walkthrough doesn’t match what you’re seeing, no stress! Just hop over to our All Levels directory and locate your exact puzzle using its visual layout.
Look closely at the faint white tick marks on each dial to know which number corresponds to the number of marks.
Level Overview
What Makes This Puzzle Tricky
You’re greeted with bold green numbers and four radar-style dials — simple in appearance but deeply misleading. The prompt “they must look at the correct number” feels intentionally cryptic. You might’ve spun them randomly or aimed all pointers at the largest digit — only to get no response. It’s not broken; the clue is hiding in plain sight, just quieter than you expect.
Your Goal
Your task is to align each of the four center dials to point precisely at a specific outer number. This isn’t about arithmetic, sequences, or spatial proximity — it’s entirely about visual detail recognition. You’ll need to count subtle on-screen cues to determine which dial belongs to which number.
How the Game Responds
- Touch Rotation: Tap and drag each dial to rotate it manually.
- Visual counting: The solution lives in tiny white tick marks embedded in each dial’s edge.
- Multi-object alignment: All four dials must be correctly positioned at once — there’s no partial credit or incremental feedback.
- UI Blindness: Those tick marks are light grayish-white against pale green, making them easy to overlook if screen brightness is low. This isn’t trial-and-error — it’s precision observation.
What Appears on Your Screen
Let’s map out the layout clearly:
- The Prompt: “they must look at the correct number” sits at the top.
- The Outer Ring: Six large green numerals arranged in two rows — Top row: 1, 2, 3; Bottom row: 4, 5, 6.
- The Center: Four green circular dials arranged in a square. Each features a white triangle pointer and subtle white tick marks around its circumference.
- Each dial has a white triangle pointer.
- Each dial has tiny white tick marks around its edge. No buttons, sliders, or draggable digits exist — only the four central dials respond to touch.
Common Mistakes to Avoid
The Trap
The biggest pitfall? Assuming math or geometry drives the logic. Players often scan the numbers 1–6 looking for patterns — maybe ascending order, symmetry, or distance-based targeting. But proximity means nothing here. What matters is matching each dial’s unique identifier — its tick count — to its assigned numeral.
First Instincts That Fail
- Aiming at the nearest number: Many instinctively point the top-left dial at “1” because it’s physically closest — but that’s incorrect.
- Guessing sequential values: Trying 1 → 2 → 3 → 4 across the dials won’t work.
- Rapid spinning: Haphazard rotation rarely reveals anything — this puzzle rewards stillness and scrutiny.
Player Reactions
I wasted nearly six minutes hunting for hidden text, dragging prompts, or checking for hidden layers — until I zoomed into a screenshot and realized the answer had been staring back at me the whole time. Once spotted, those tick marks become impossible to ignore.
Step-by-Step Solution
Preparing the Move
Pause before touching anything. Focus solely on the four green dials. Those barely visible white hash marks around each circle? That’s your roadmap.
Executing the Solution
- Analyze the Top-Left Dial: Count the tick marks on its edge. There are 2 ticks. Move: Drag/Rotate this dial until the white triangle points directly at the big number 2 .
- Move: Drag/Rotate this dial until the white triangle points directly at the big number 2 .
- Analyze the Top-Right Dial: Count the ticks. There are 4 ticks. Move: Rotate this dial to point at the big number 4 .
- Move: Rotate this dial to point at the big number 4 .
- Analyze the Bottom-Left Dial: Count the ticks. There are 5 ticks. Move: Rotate this dial to point at the big number 5 .
- Move: Rotate this dial to point at the big number 5 .
- Analyze the Bottom-Right Dial: Count the ticks. Only 1 tick here. Move: Rotate this dial to point at the big number 1 .
- Move: Rotate this dial to point at the big number 1 .
Confirming It Worked
As soon as the final dial locks onto its target, the level completes automatically — no button press required. If nothing happens, double-check alignment accuracy.
If It Did Not Work
- Precision is critical. If the pointer lands between two numbers — say, halfway between 4 and 5 — the level won’t register it. It must land cleanly on the intended digit.
- Lift your finger carefully. Your fingertip may block the view of the pointer tip — pause slightly before releasing to confirm your aim.
Small Details That Matter
Rotating accurately can be tricky on compact screens due to how Game is Hard handles touch input.
- Long Drag: Avoid quick flicks. Instead, tap, hold, and sweep your finger in a wide arc around the dial’s perimeter — this gives smoother, more precise control.
- The "Snap": No magnetic alignment exists — success depends entirely on your manual accuracy.
- I fixed it by: I noticed my Bottom-Left dial was hovering just shy of 5. A tiny nudge right brought the pointer dead-center on “5,” and the win screen appeared instantly.
Why This Solution Works
This level masterfully contrasts assumption with observation.
You might assume all dials are interchangeable — but they’re not. Each carries a unique signature: its tick count. The game tests whether you examine individual elements or skim the scene as a whole.
It’s also a direct exercise in data pairing:
- Tick marks = quantity.
- Large green digits = symbols. Linking quantity to symbol turns this into an elegant matching challenge — disguised as a brain-bender.
Bonus Tip
For speed runs or replays, use this mental shortcut:
- Top-Left goes Middle Top (2).
- Top-Right goes Bottom Left (4).
- Bottom-Left goes Bottom Middle (5).
- Bottom-Right goes Top Left (1).
- Ignore numbers 3 and 6 completely. They serve only as visual noise.
Alternative Attempts on Game Is Hard Level 89 (What Doesn’t Work, and Why)
Here’s what players tried — and why it failed:
- Pointing Top-Left at 1: Assumed “first dial = first number.” Wrong — it has 2 ticks.
- Pointing Bottom-Right at 6: Assumed “last dial = last number.” Wrong — it has just 1 tick.
- Dragging numbers onto dials: The large digits are static background art — immovable.
- Shaking the device: No motion sensor triggers exist in this level.
- Waiting for auto-rotation: Dials never move on their own — full manual control only.
- Multi-touch manipulation: No need to adjust all dials simultaneously — one-at-a-time works perfectly.
Common Mistakes for Game Is Hard Level 89
- Miscounting ticks: On small screens, distinguishing 4 from 5 marks takes focus — zoom in or squint.
- Accidentally nudging set dials: It’s easy to bump a dial you’ve already aligned while adjusting its neighbor — verify each before moving on.
- Low screen brightness: White ticks vanish against light green when brightness is dimmed — crank it up.
- Overlooking bottom-row numbers: Since the top row dominates visual attention, players sometimes forget 4, 5, and 6 even exist.
- Post-release drift: Occasionally, the dial shifts minutely upon finger lift — watch where it settles.
Pattern Recognition: How to Spot This Trick in Future Game Is Hard Levels
The Tell
When multiple identical-looking objects appear alongside a set of numbers (dials, tiles, icons), inspect them closely. Look for micro-variations: ticks, dots, scratches, shading differences — anything that makes one stand apart.
The Habit
Count first — always. Before applying logic or math, tally visible elements: lines, letters, corners, symbols. More often than not, the solution hides in the count of something unassuming.
Game Is Hard Level 89 FAQ (Short, Useful)
Q: Do I need to point them in a specific order in Game is Hard Level 89? A: No. You can set the dials in any sequence (e.g., start with bottom-right). The game validates only the final configuration.
Q: Why isn't the level finishing even though they point correctly in Game is Hard Level 89? A: One dial is likely off-center. The tolerance window for correct alignment is narrow — gently nudge each until the level registers.
Q: Does the text "look at the correct number" mean I need to use my camera in Game is Hard Level 89? A: No. No camera access is needed. “Look” refers strictly to the dial’s pointer aiming at the digit.
Q: Are the numbers 3 and 6 used for anything? A: No. They’re purely decorative distractions — included for balance, not function.
More Game Is Hard Solutions
If this guide rescued your streak, we’ve got every level covered — written to skip filler and solve the exact frustrations that make you want to toss your phone. Share this with friends hitting the same wall!