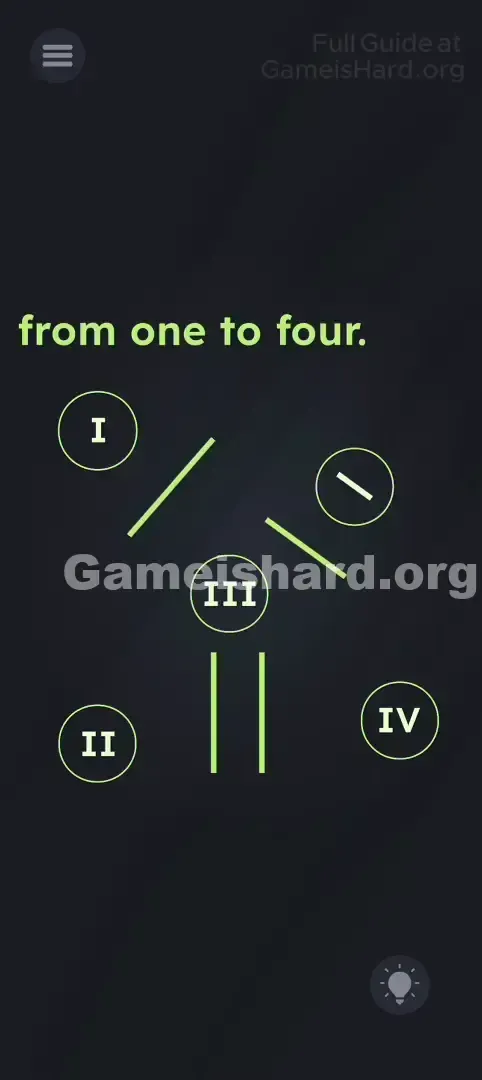
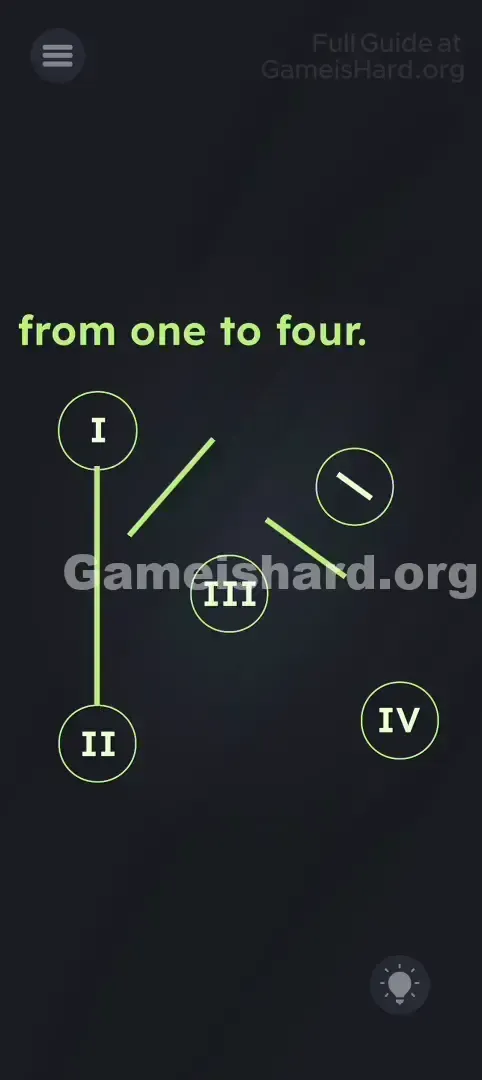
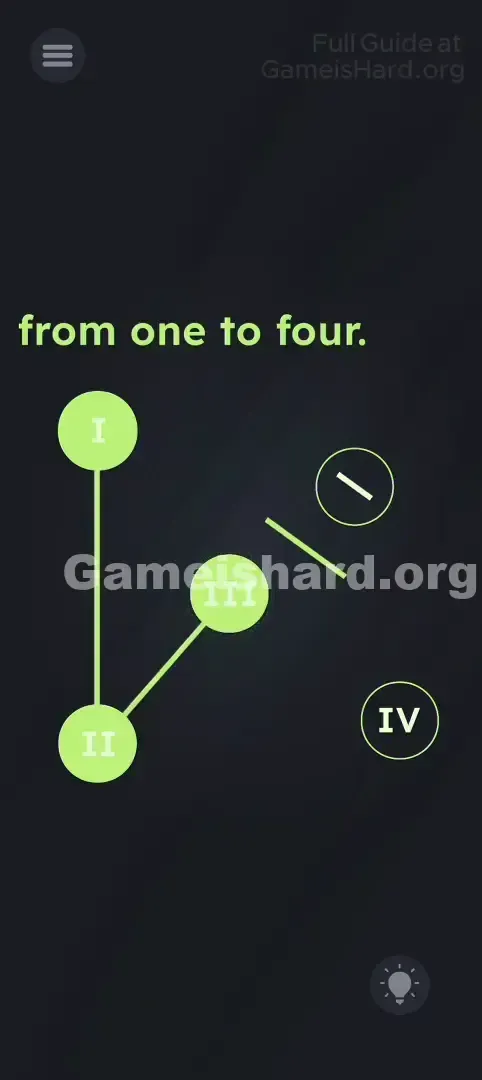
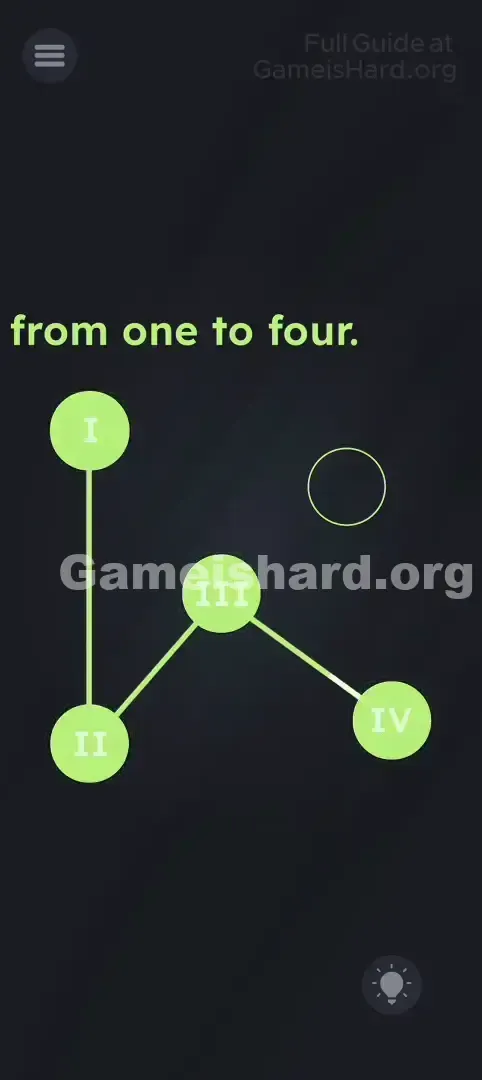
App updates can sometimes shuffle the order of puzzles. If this level 178 walkthrough doesn't match your screen, don't worry! You can browse our All Levels guide to find your exact puzzle by its picture.
You are basically building a bridge between the numbers in Roman numeral order (1-2-3-4).
Level Overview
What Makes This Puzzle Tricky
You’re greeted with scattered circles and loose line segments — no obvious way to interact. The prompt “from one to four” hints at sequence, but tapping or swiping the circles does nothing. It’s a visual puzzle disguised as a simple counting task, and the real challenge lies in recognizing which elements you can manipulate.
Your Goal
Your mission is to form a continuous path linking the Roman numeral circles — I → II → III → IV — using only the movable line pieces on screen. This isn’t about inputting a sequence; it’s about constructing a physical connection, like assembling a circuit board.
Key Mechanics
- UI Drag: The floating line segments are draggable objects — not static decor.
- Visual Construction: Success depends on mentally aligning pieces before moving them.
- Roman Numerals: The solution follows strict numerical progression (I → II → III → IV). This puzzle mimics plumbing or wiring — not arithmetic.
What Appears on Your Screen
The interface features a dark background with bright green elements.
- The Text: At the top, it simply reads "from one to four."
- The Nodes: You see four circles labeled with Roman numerals: I (top left), II (bottom left), III (center), and IV (bottom right).
- The Debris: Floating between these nodes are several disconnected lines: Two vertical bars (like a pause symbol || ). Two diagonal lines slanting different ways.
- Two vertical bars (like a pause symbol || ).
- Two diagonal lines slanting different ways.
- A small circle containing a short slash/minus sign. It resembles a disassembled schematic waiting for reassembly.
Common Mistakes to Avoid
The Trap
The most common pitfall is “Tap Fatigue”: players instinctively tap I, then II, then III, then IV — expecting a reaction. When nothing happens, they try dragging the circles themselves. But the circles are fixed. The level misdirects attention toward the targets instead of the tools — the lines are the real interactive elements.
First Instincts That Fail
- Tapping in order: Repeating this pattern won’t trigger progress.
- Shaking the phone: A frequent last-resort move — but it has zero effect here.
- Dragging the numbers: Circles I–IV are immovable anchors — they stay put.
Player Reactions
I wasted nearly a minute trying to draw connections with my finger, assuming it was a classic “connect-the-dots” challenge. It clicked only when I realized those floating shapes weren’t decoration — they were the only tools I needed. I’d been searching for a way to draw new lines, not use the ones already provided.
Step-by-Step Solution
Preparing the Move
Focus on the cluster of green line fragments near the center — those are your building blocks. Your job is to position them precisely to span the gaps between numbered circles.
Executing the Solution
- Link I to II: Locate the two vertical bars near the bottom center. Drag them together on the left side to form a clean vertical link between circle I and circle II . They’ll align smoothly, resembling a single pipe.
- Link II to III: Pick up the longer diagonal line angled upward-right. Position it so it bridges circle II (bottom left) directly to circle III (center).
- Link III to IV: This final segment requires combining two parts. Place the remaining diagonal line starting from circle III and angling toward circle IV . Then take the small circle containing the “minus” sign (slash) and drag just the slash — or the whole circle if it moves as one — to complete the connection to circle IV . You're merging two smaller elements into one functional bridge.
- Take the remaining diagonal line and place it coming off circle III towards circle IV .
- Take the small circle with the "minus" sign (slash) inside it. Drag just the slash (or the circle if it moves as one) to bridge the final gap to circle IV . You are combining two smaller pieces to make one long connection.
If It Did Not Work
- Precision matters: If the level doesn’t register completion, gently adjust your lines — their ends must visibly touch the green edges of the circles.
- Wrong pieces: Reserve the vertical bars exclusively for the I→II gap. Diagonals won’t fit that vertical space correctly.
- Order: Completion triggers only after the full I-II-III-IV chain is intact — partial links won’t count.
Why This Solution Works
This level tests object recognition and spatial reasoning — not math. Those floating lines aren’t set dressing; they’re interactive components. The engine checks for direct visual linkage: Circle I must be joined to Circle II via a placed object, and so on down the chain. Think of it as wiring logic — “from one to four” means build the path, not decode a riddle.
Bonus Tip
If you’re replaying or racing through:
- Start with I → II — it’s the most straightforward alignment.
- Treat the “minus” circle as just another short line piece — no special meaning beyond its shape.
- Rotation isn’t possible — lines keep their preset angles, so match slope to gap.
Frequently Asked Questions
Q: Can I rotate the lines? A: No. The lines have fixed orientations. You have to match the slope of the gap with the slope of the line provided.
Q: Do I have to connect them in order? A: You can place the bridges in any order (e.g., connect III-IV first), but the level only ends when the entire chain I-II-III-IV is complete.
Q: My finger covers the line and I can't see where I'm placing it! A: Try dragging from the very edge of the line object, or use a stylus if you have one. The hitboxes are usually forgiving, so close enough is often good enough.
Q: Is there a hidden piece? A: No hidden pieces. Everything you need is visible in the center cluster at the start.
More Game Is Hard Solutions
If this guide saved your streak, check out the rest of our walkthroughs. We write these to be fast, accurate, and free of the usual SEO fluff that buries the answer. Share this with your friends if they are stuck on the same level!